Wiring Harness Inspection
The next logical step in getting the machine up seemed to be going through the wiring harnesses, so I spent some time stripping them all completely out of the machine (and taking pictures each step of the way so I’ll hopefully remember how to put them back). Pulling everything out also means the chassis itself can get worked on too, parts of it will definitely need some wire brushing and repainting.
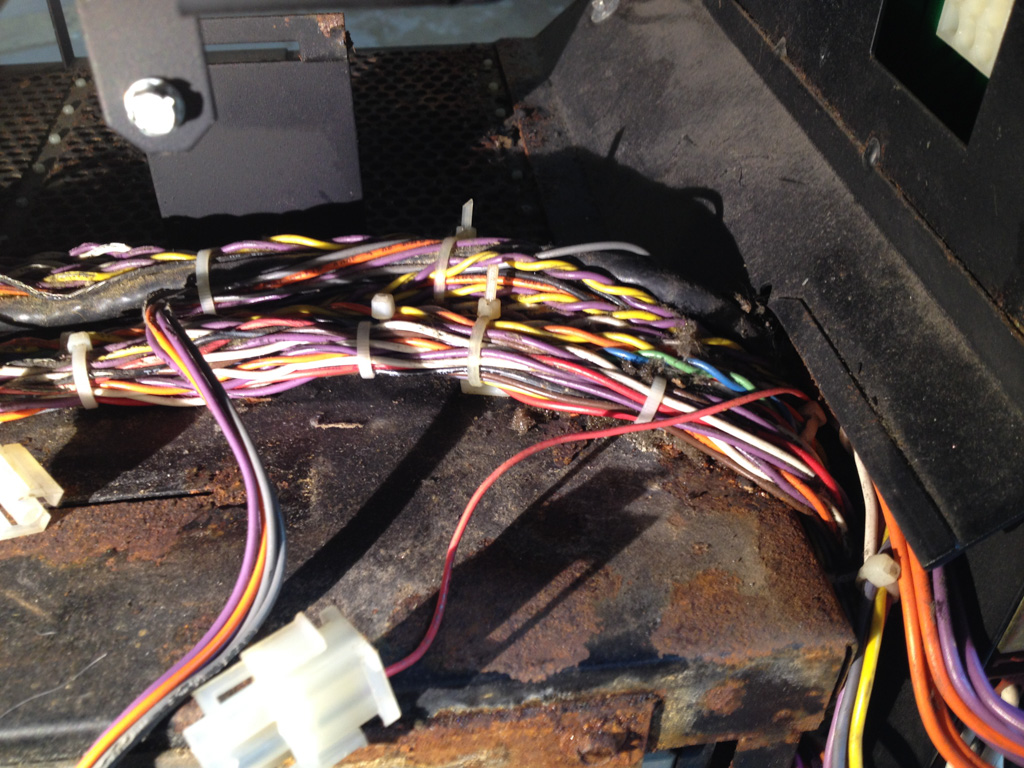
Part of the wiring harness before removing it from the chassis.
There’s two main power harness that run to most of the systems in the machine, which are thankfully still in good condition. As parts of them are hardwired directly into the transformer, it would have been a big pain to replace parts of these. They were pulled out to inspect, but looks like they’ll just get reinstalled as-is since there’s no damage.
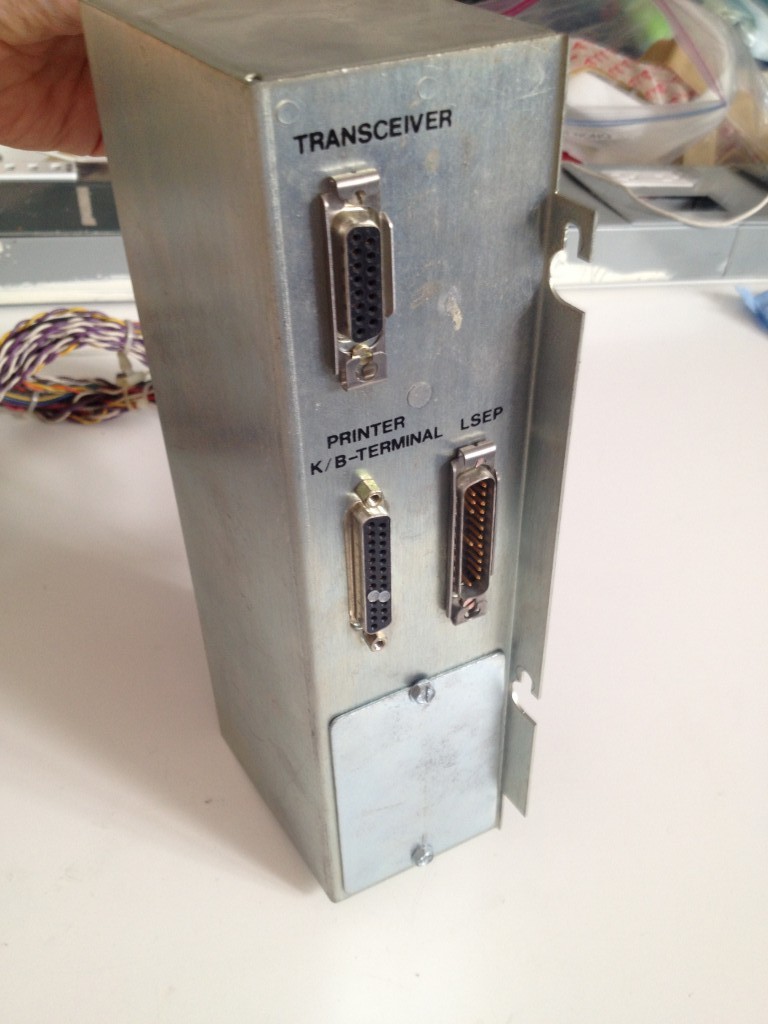
The I/O pod removed from the back of the machine.
The I/O harness runs from the front of the card cage to a removable “pod” containing all of the ports on the back of the system. The mice that were living in this machine ate large sections of insulation off the wires of this harness (to use as nesting material I assume?), so a lot of it is going to have to be re-wired. I spent the afternoon today beeping out each connector and drawing a schematic of the harness in EAGLE, which should help keep track of everything as I rebuild the harness.
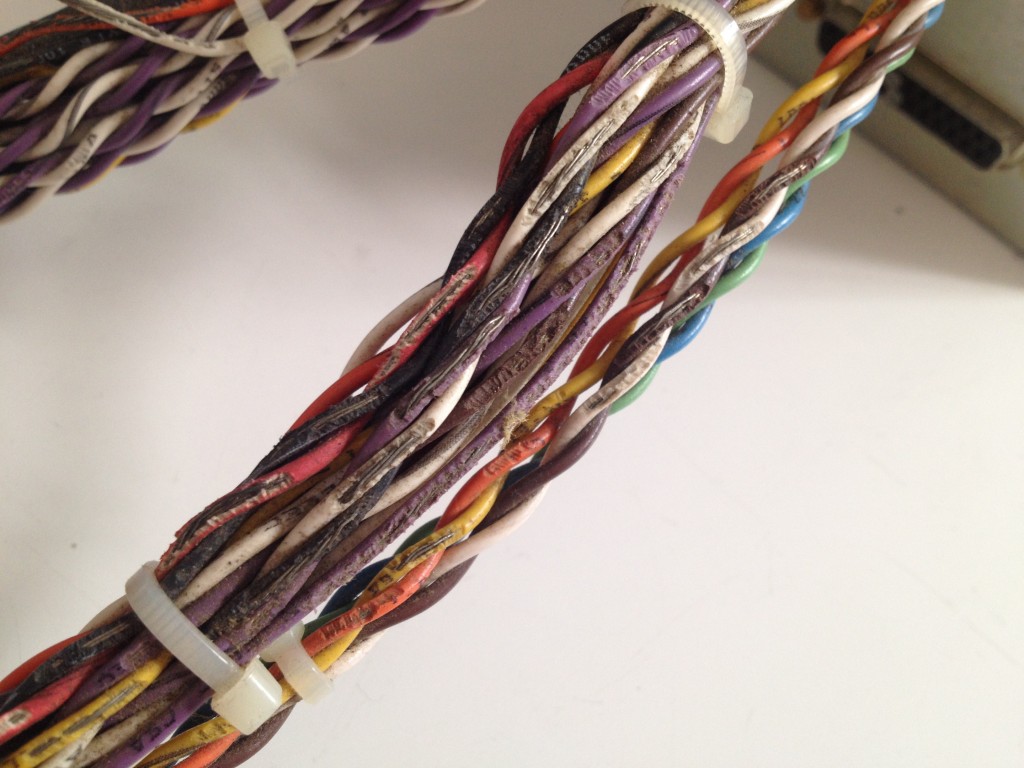
Part of the I/O harness showing damaged wires from mice.
Next step will be to figure out which specific wires need replacing, and how much wire I need to get. Then it’ll be getting a whole bunch of stranded wire and crimp pins for the connectors and replacing wires one by one!
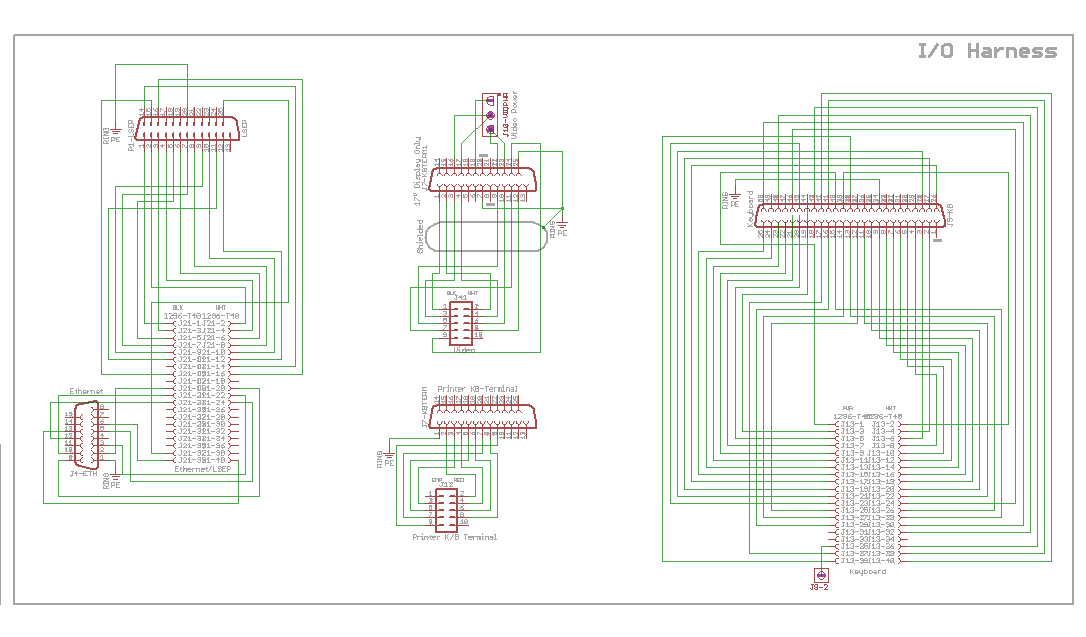
Completed EAGLE schematic of the I/O harness.
Leave a Reply